Notes
PLaMo Translation
On 2025/05/27, Preferred Networks (PFN) released PLaMo Translation. For details, see the official blog, but briefly, PLaMo Translation is an LLM-based translation model, similar to ChatGPT.
The model is published on HuggingFace and a demo page is available. Since the model is public on HuggingFace, we can run it on our local PCs. PFN also announced a CLI for it: PLaMo Translation CLI.
There are several ways to run the model; here I introduce how to run it with LM Studio.
LM Studio
LM Studio is a GUI app that lets you run LLM models locally. Install it by downloading the installer from the download page and running it.
Download the model
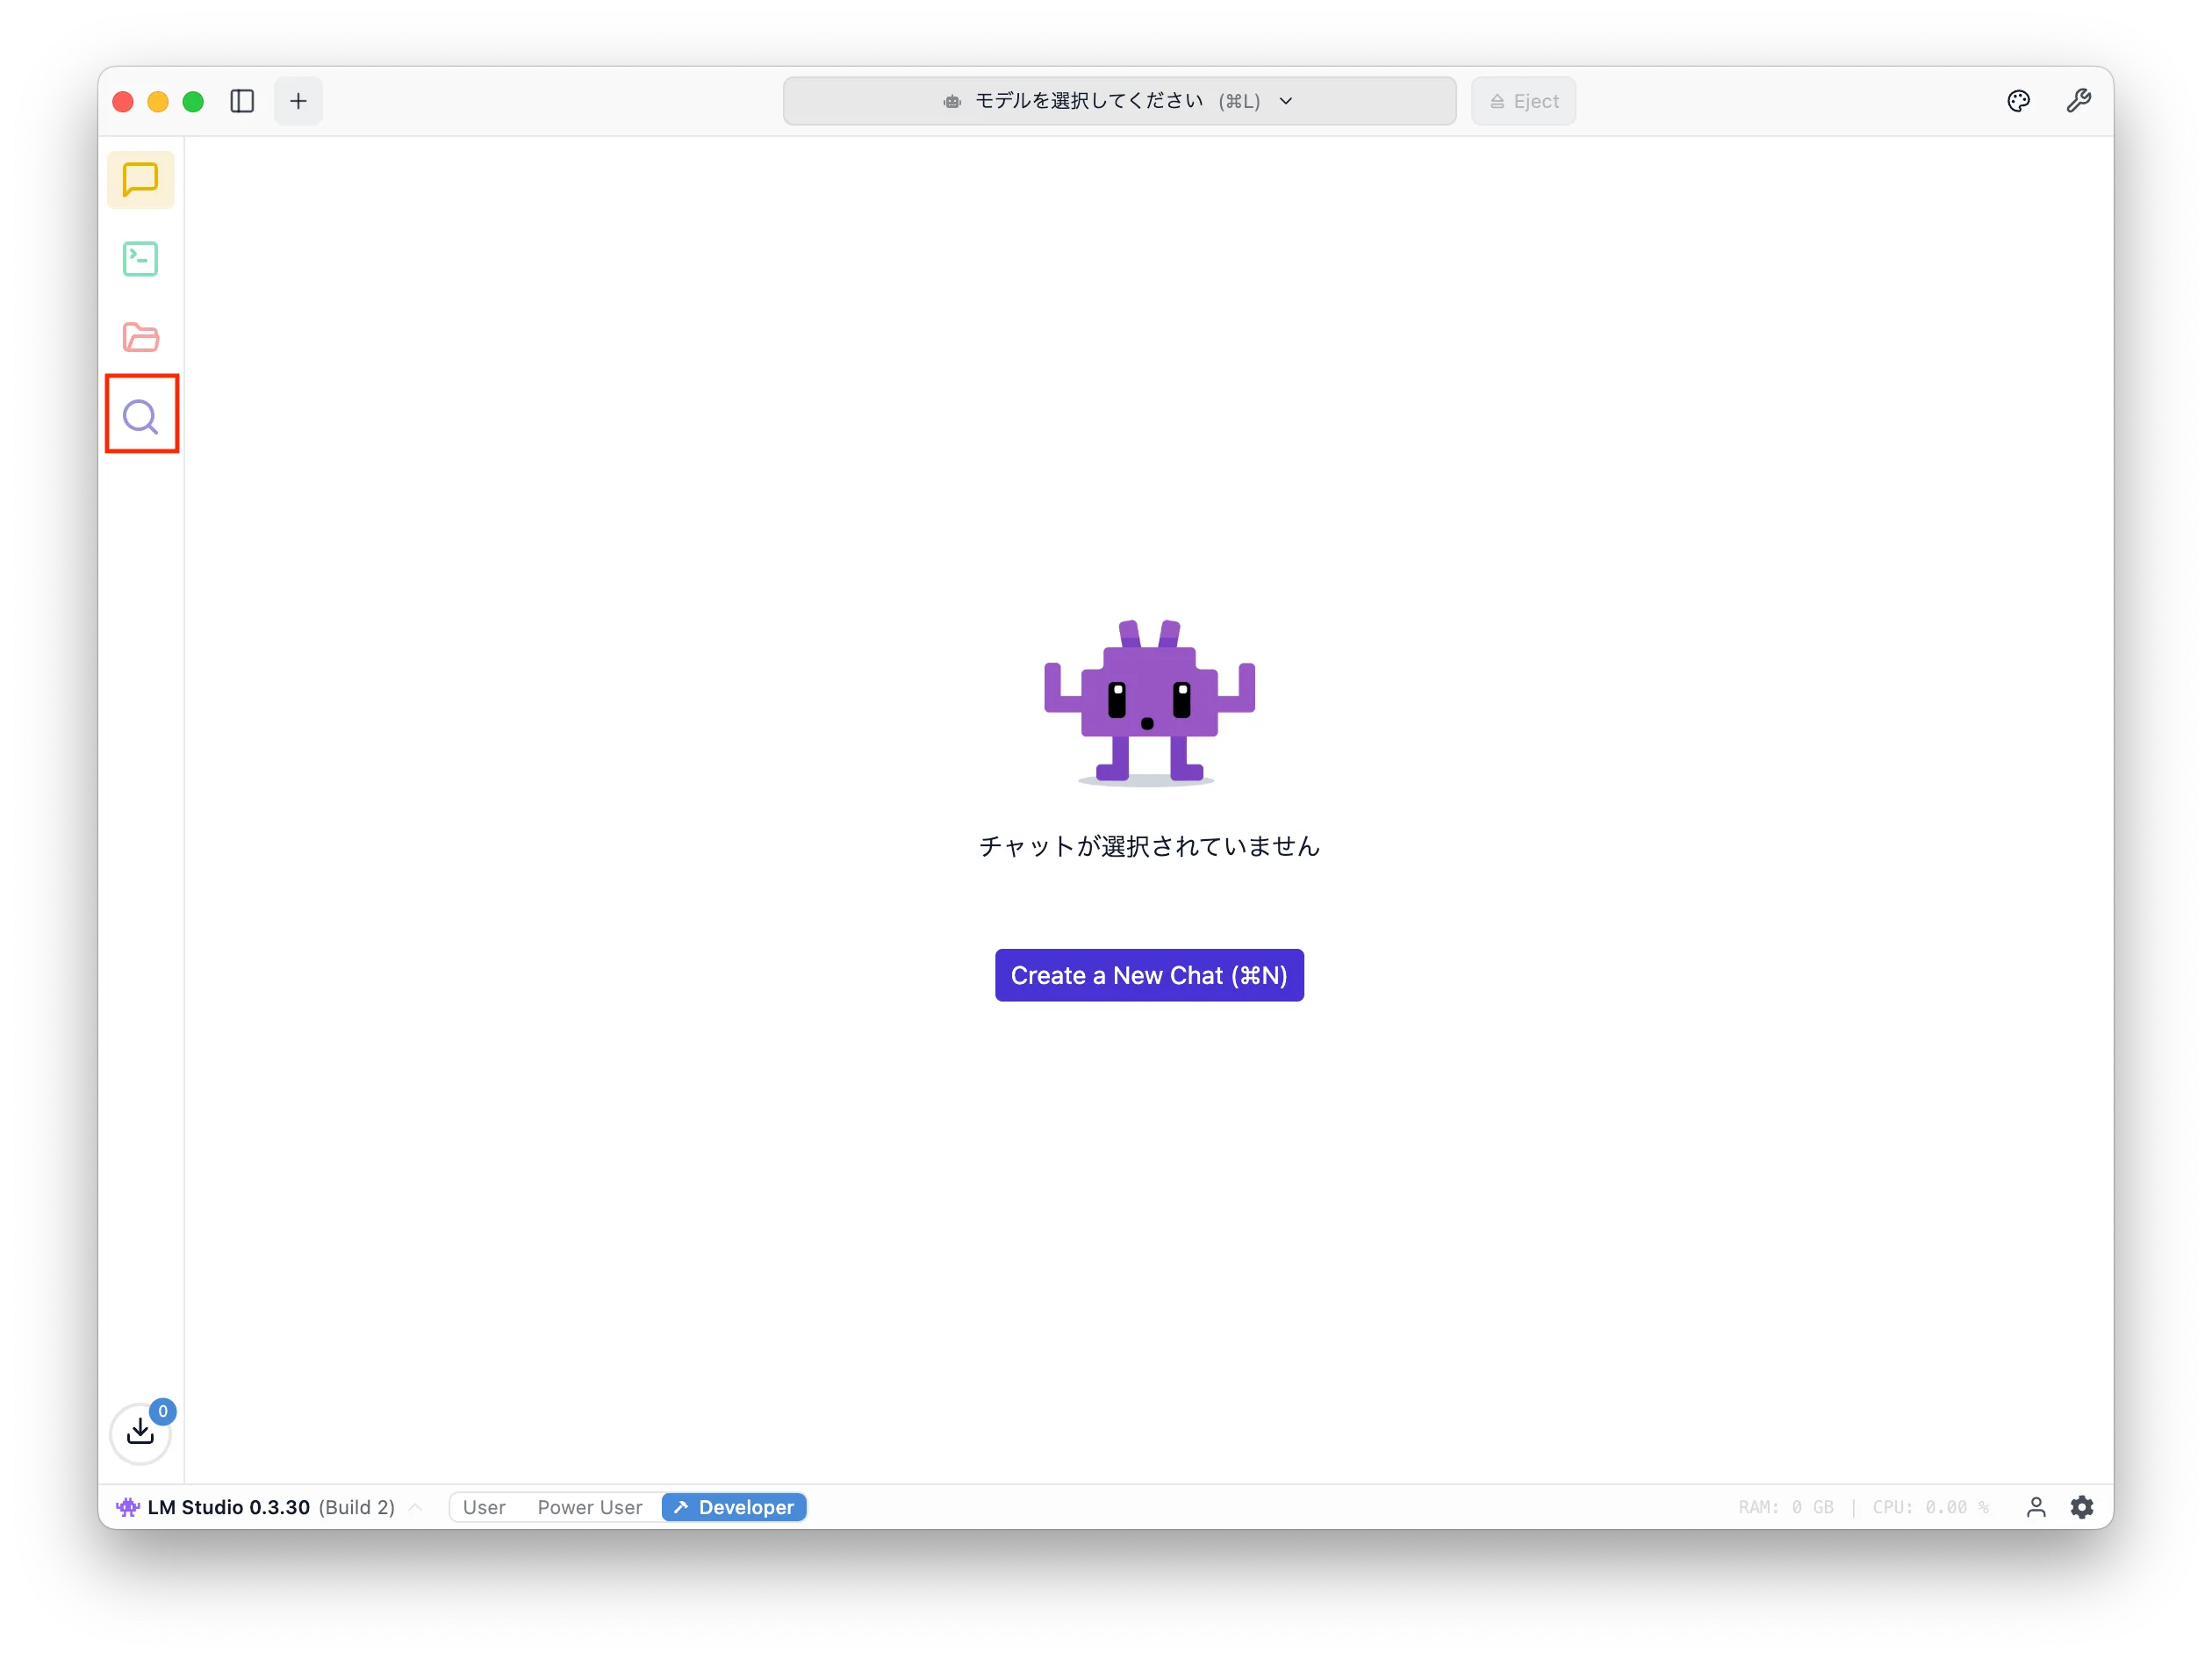
After launching LM Studio, download the model. Click the magnifying-glass icon on the left to open the search screen.
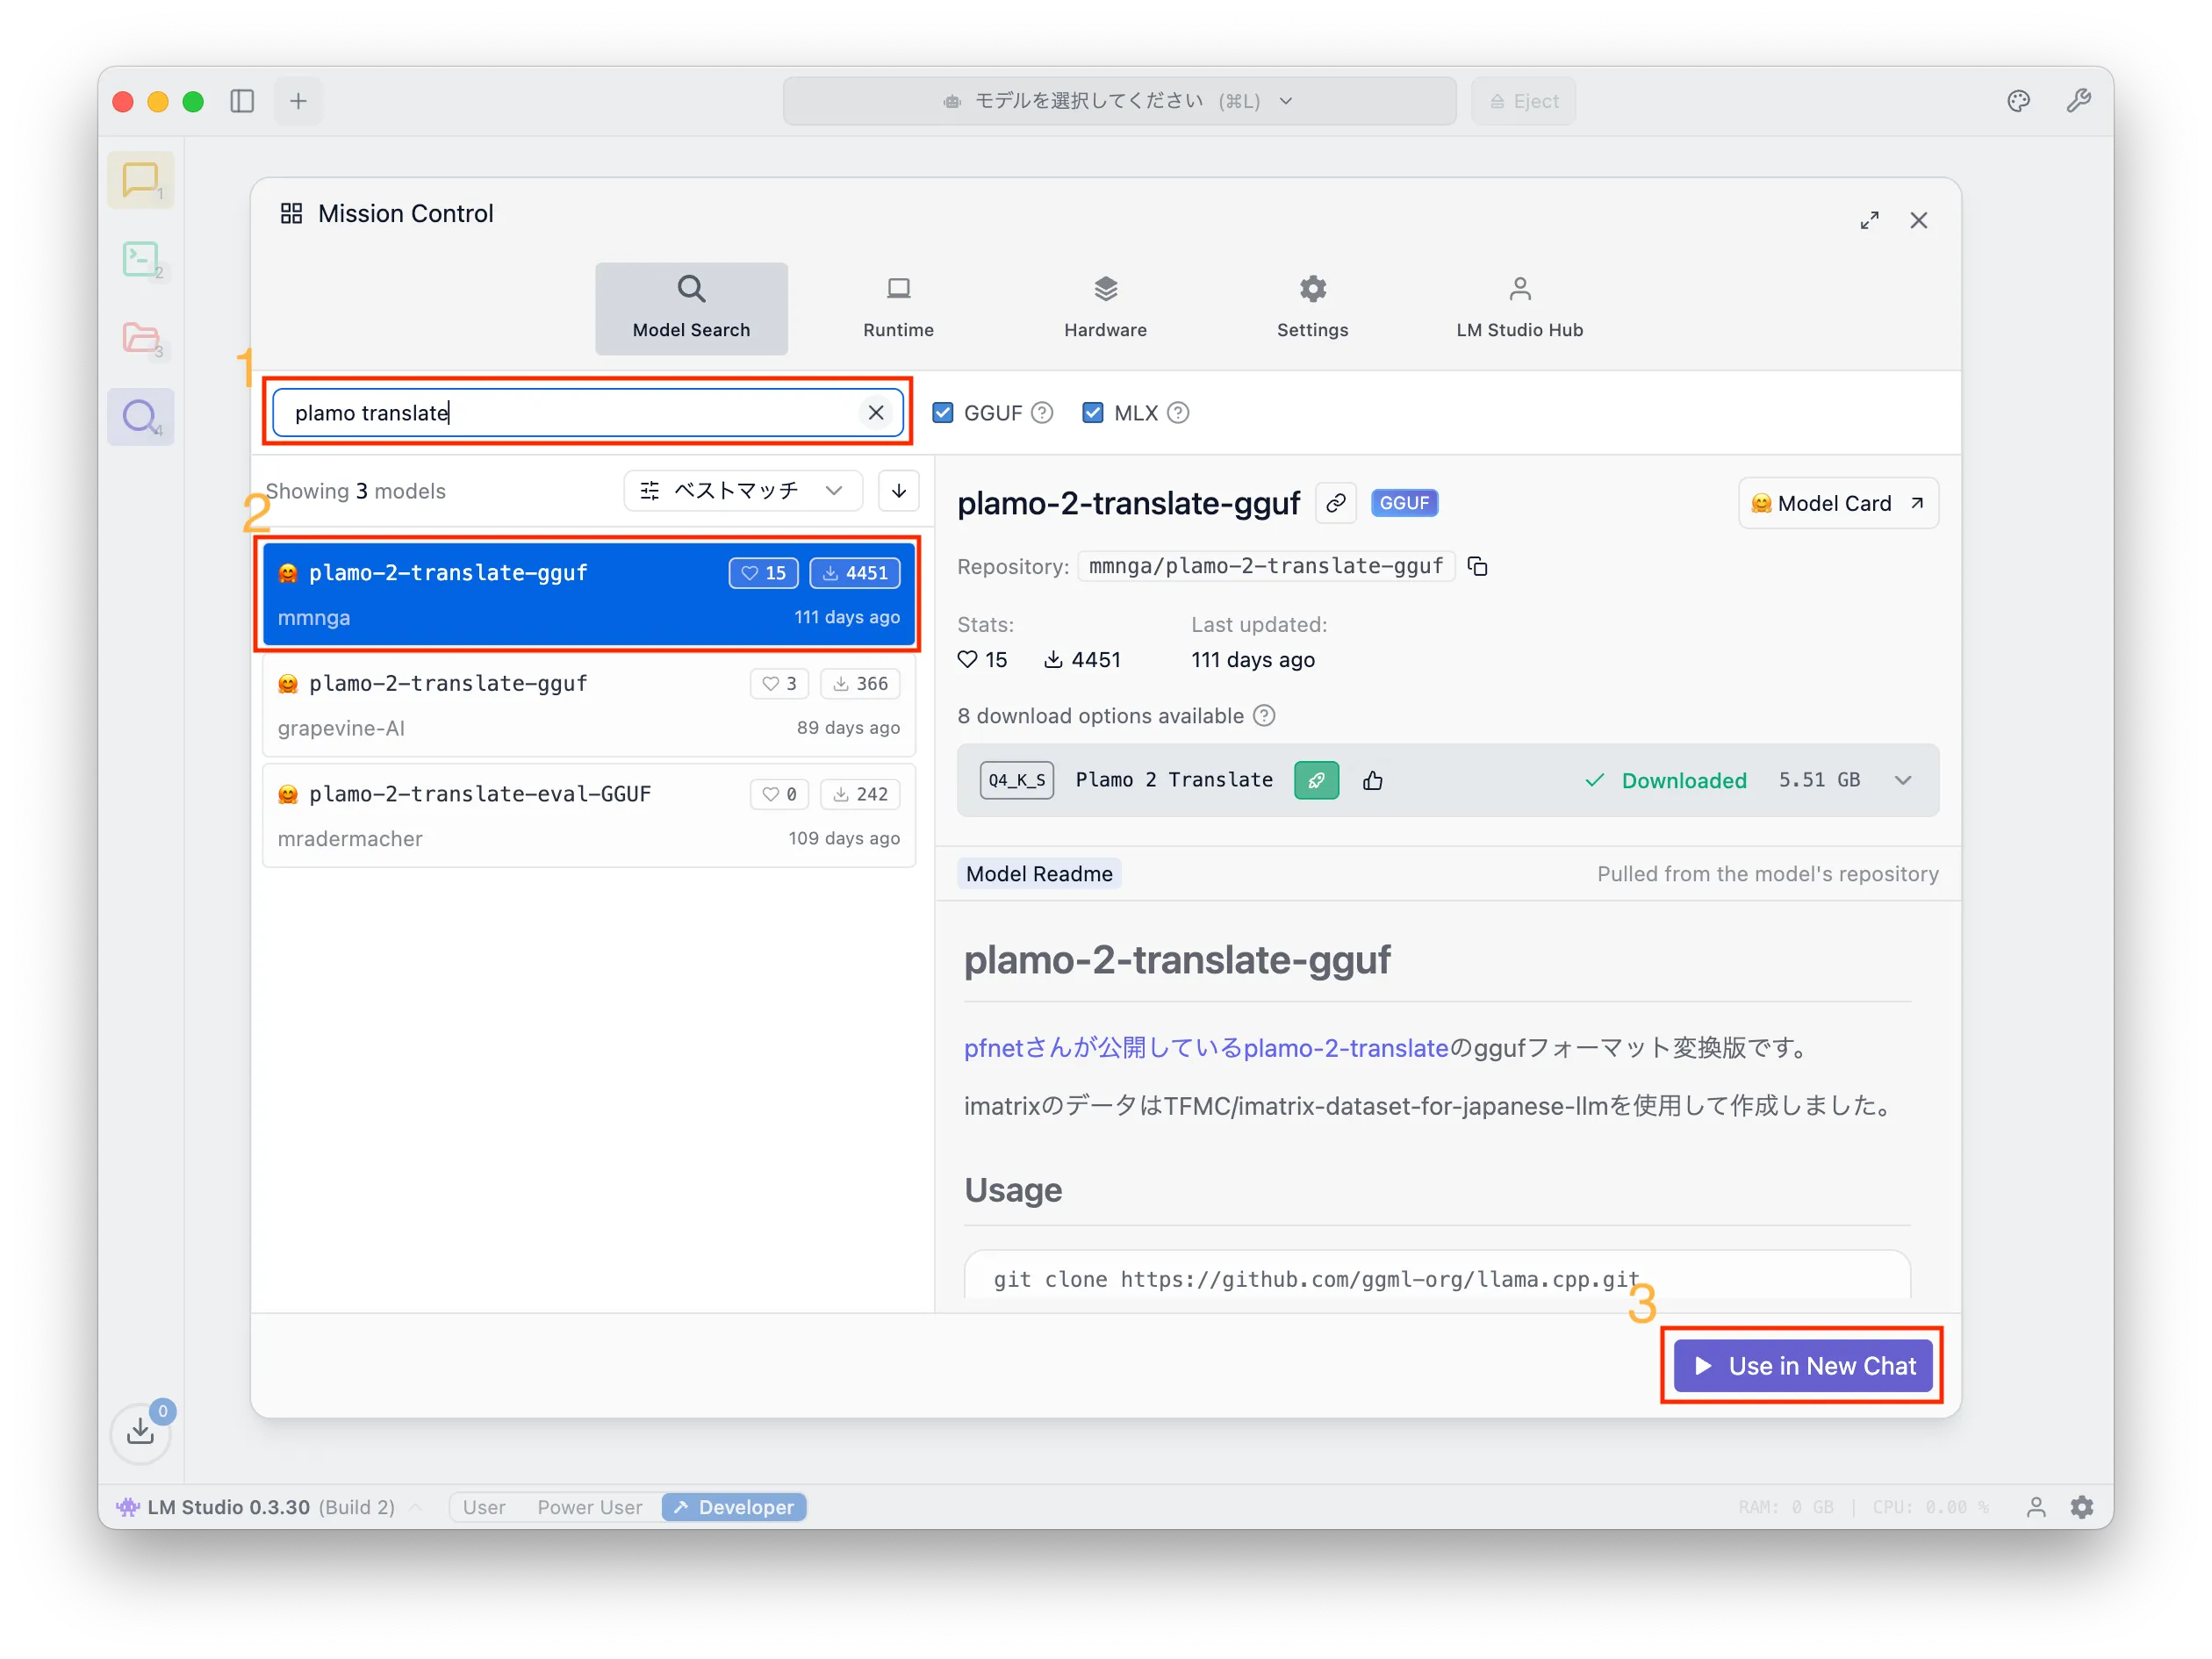
Search for "plamo translate" and you will see several models. Select the one published by mmnga and click "Download". In the screenshot it says "Use in New Chat" because the model is already downloaded.
Model settings
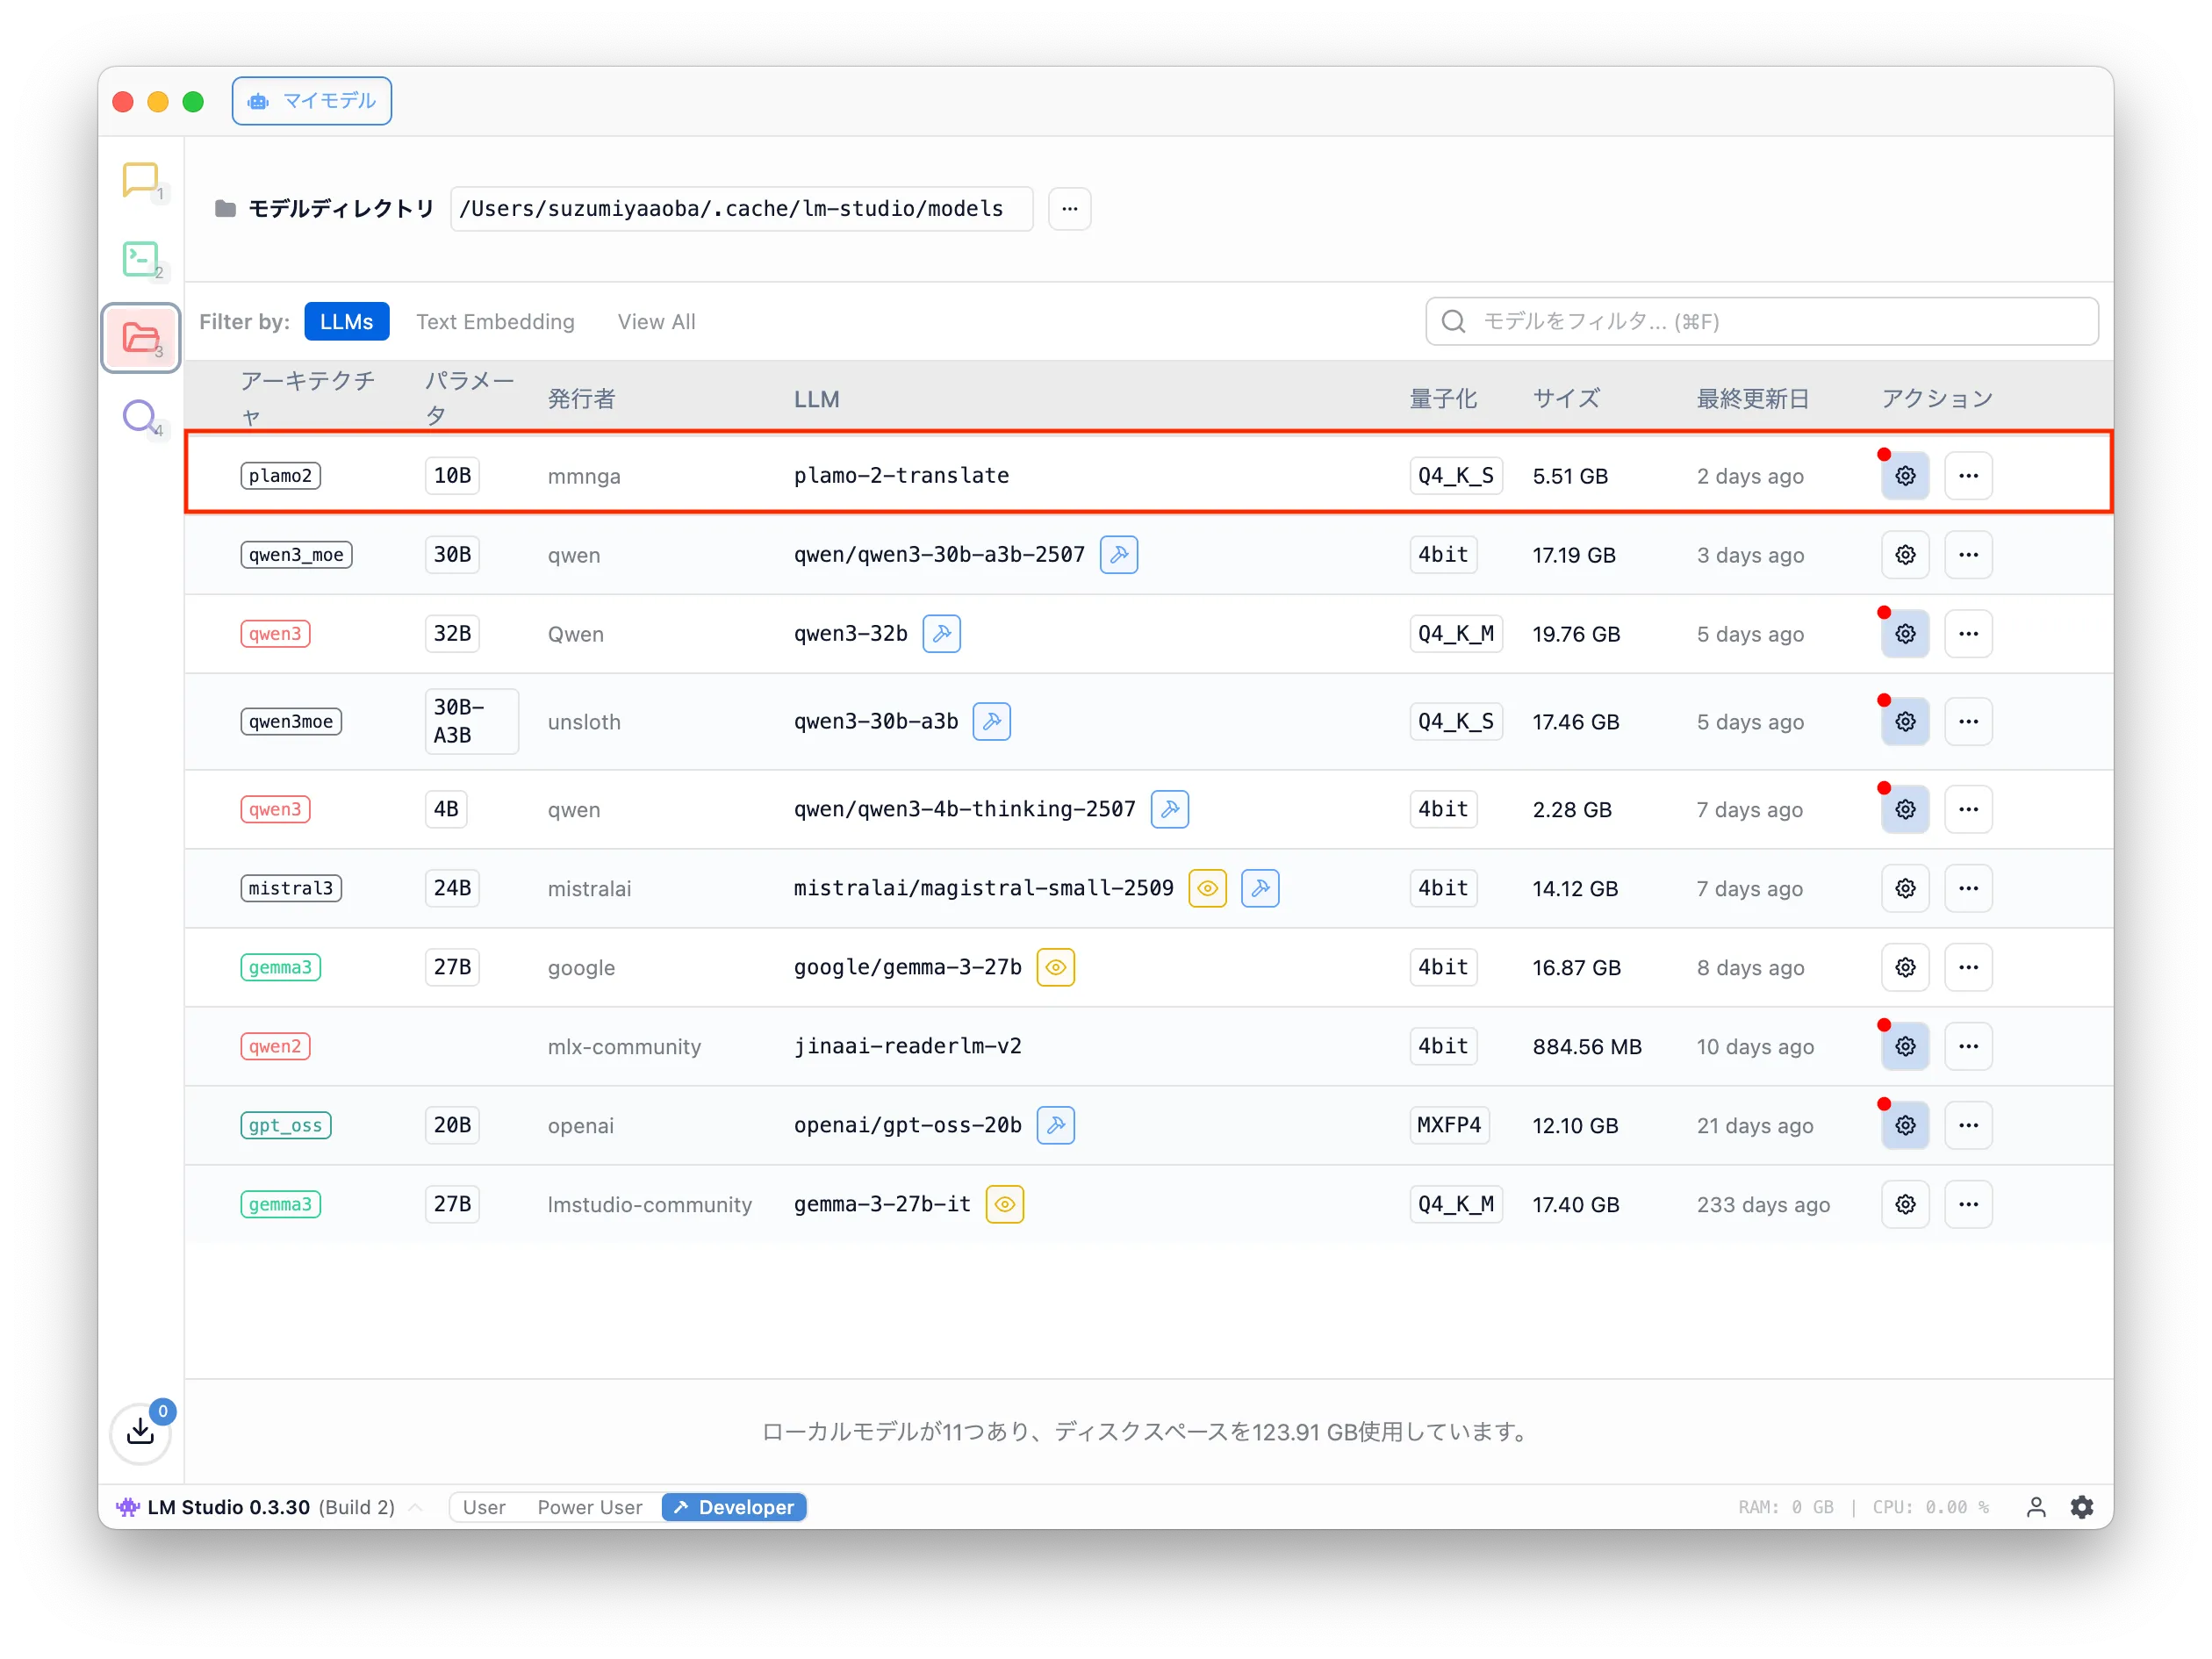
After downloading, click the folder icon on the left to open the list of downloaded models.
Find the model named plamo-2-translate and click the gear icon in the Action column.
This opens the settings to edit the default parameters. To use PLaMo Translation in LM Studio, change the Prompt Template and Stop String under the Prompt tab. While writing this, I realized changing Additional Stop Strings might also work.
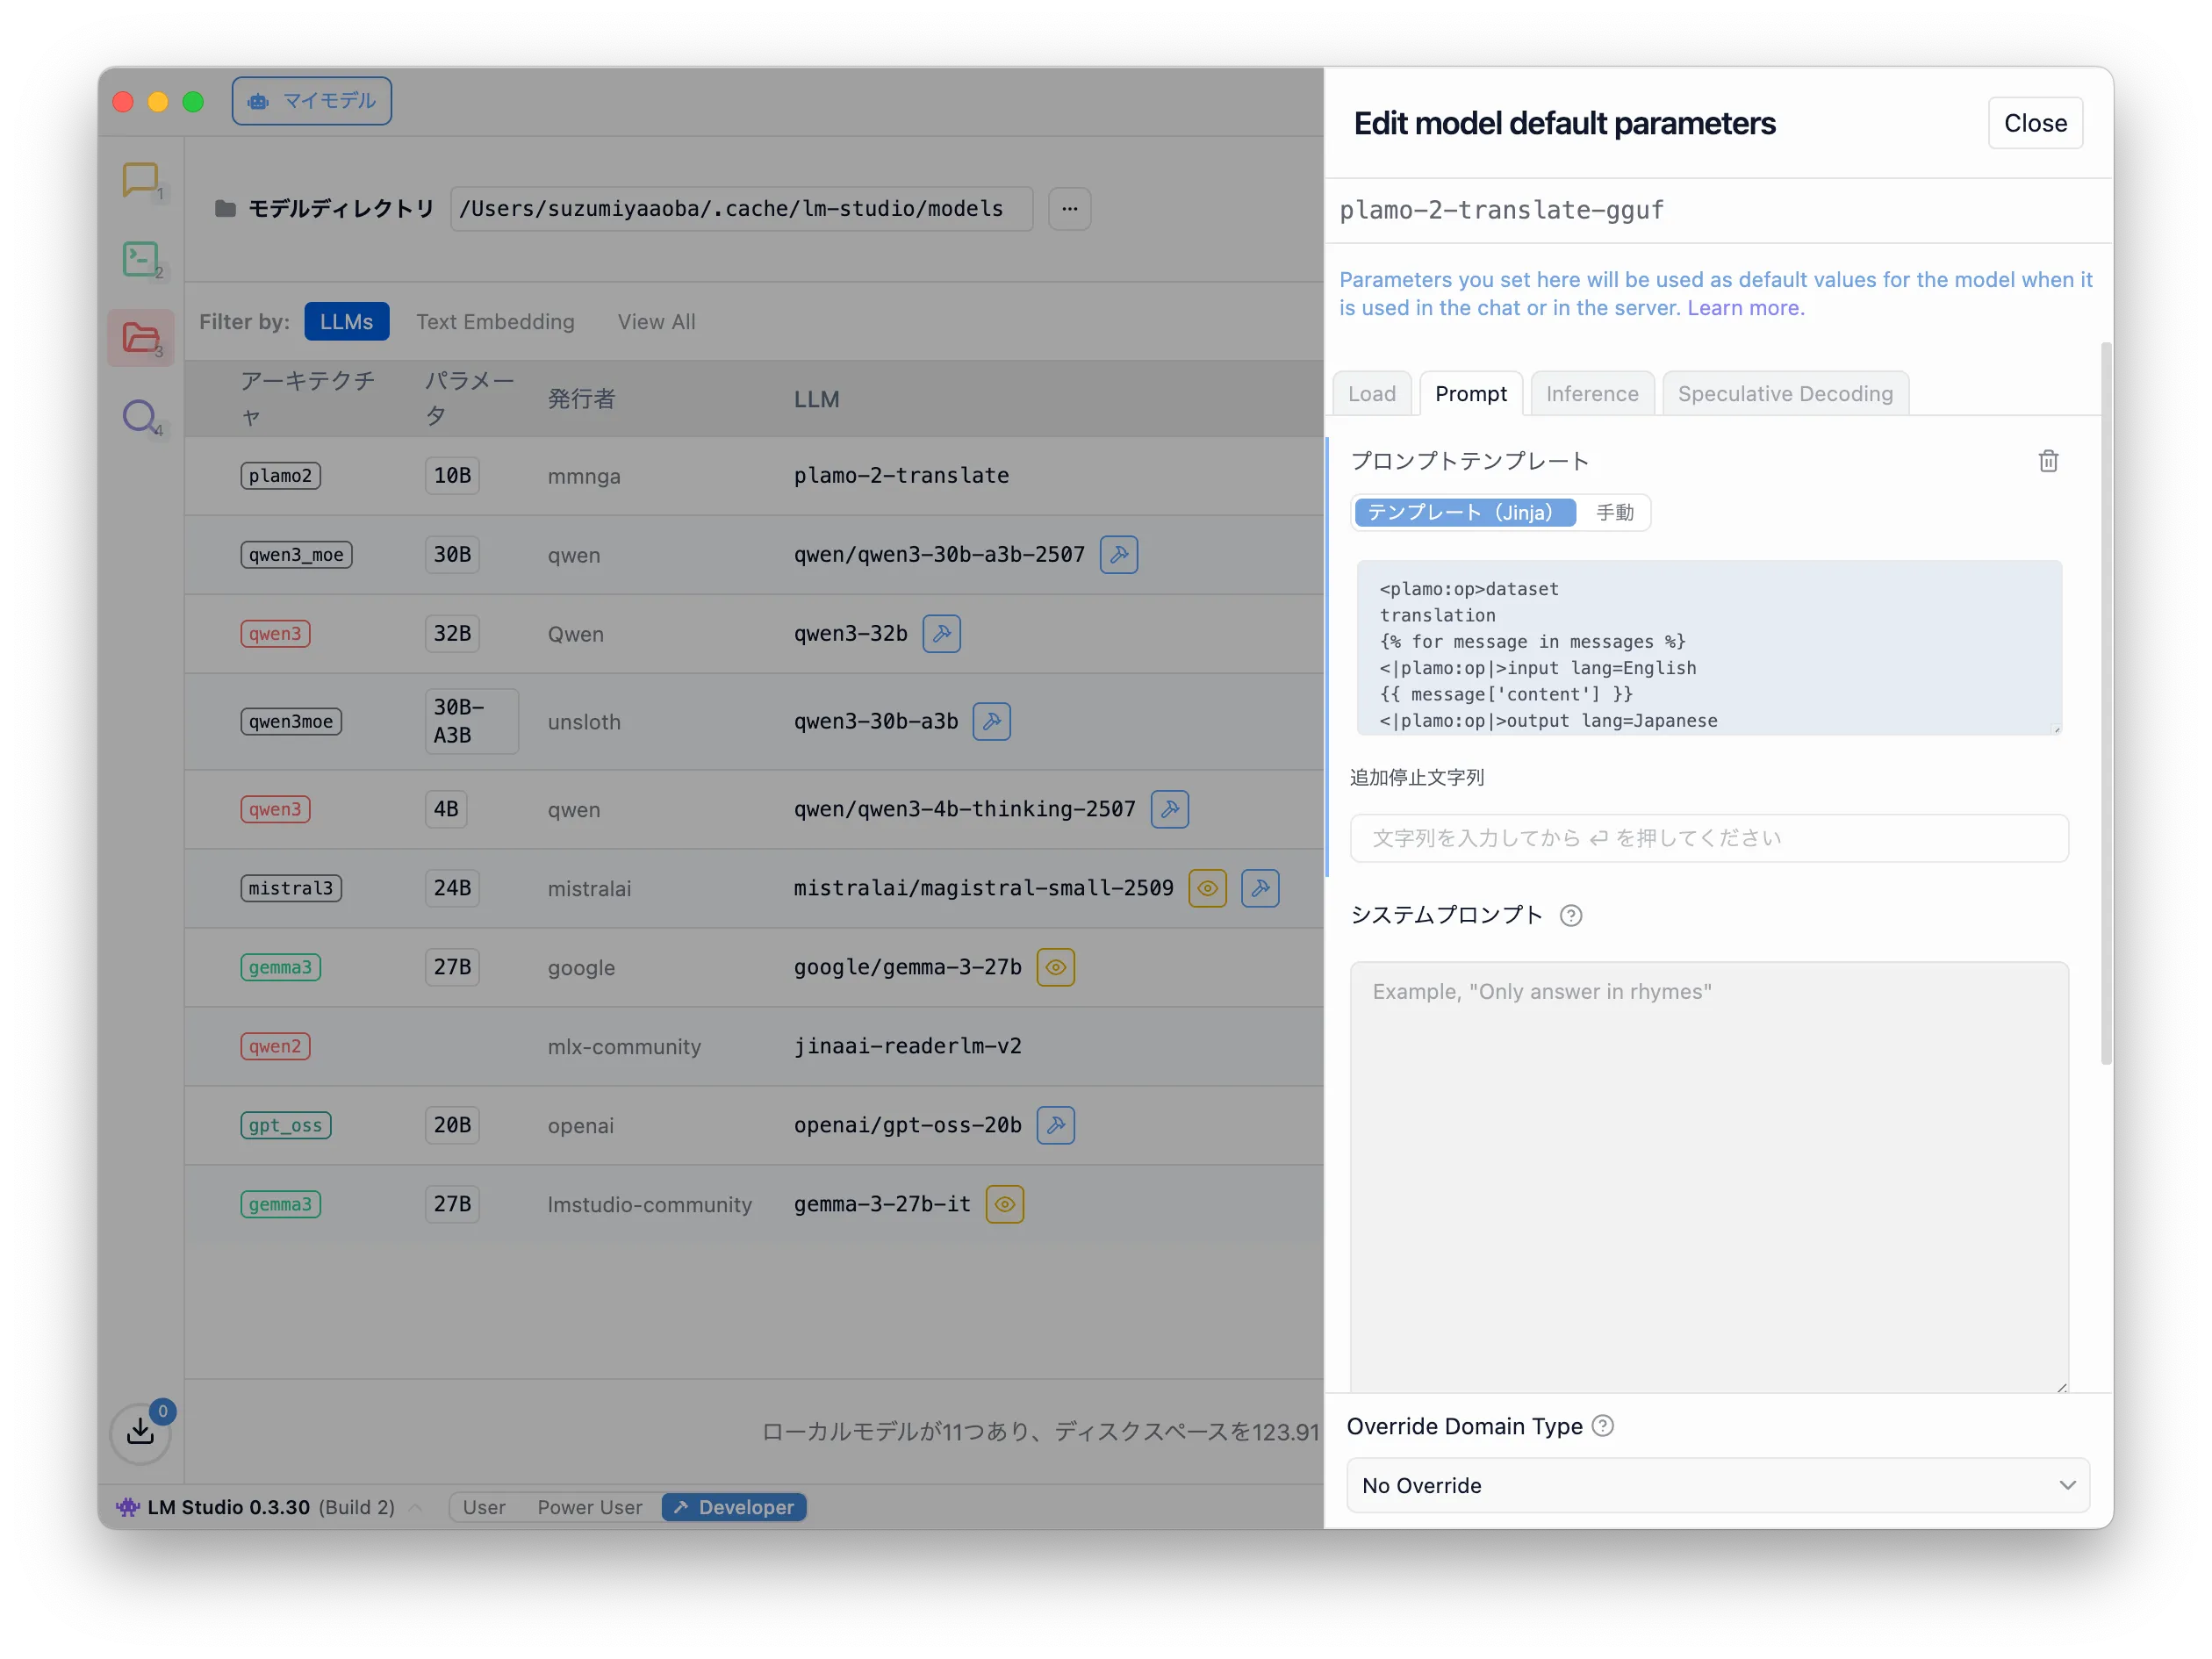
Prompt template
Delete all default text (Template/Jinja) and replace it with:
1<|plamo:op|>dataset2translation3{% for message in messages %}4<|plamo:op|>input lang=English5{{ message['content'] }}6<|plamo:op|>output lang=Japanese7{% endfor %}
This is for English -> Japanese translation. For Japanese -> English, use:
1<|plamo:op|>dataset2translation3{% for message in messages %}4<|plamo:op|>input lang=Japanese5{{ message['content'] }}6<|plamo:op|>output lang=English7{% endfor %}
Stop string
Set the stop string to:
1<|plamo:op|>

After entering it and pressing Enter, you will see tags like in the screenshot.
Try it
Click the speech-bubble icon on the left to open the chat UI.
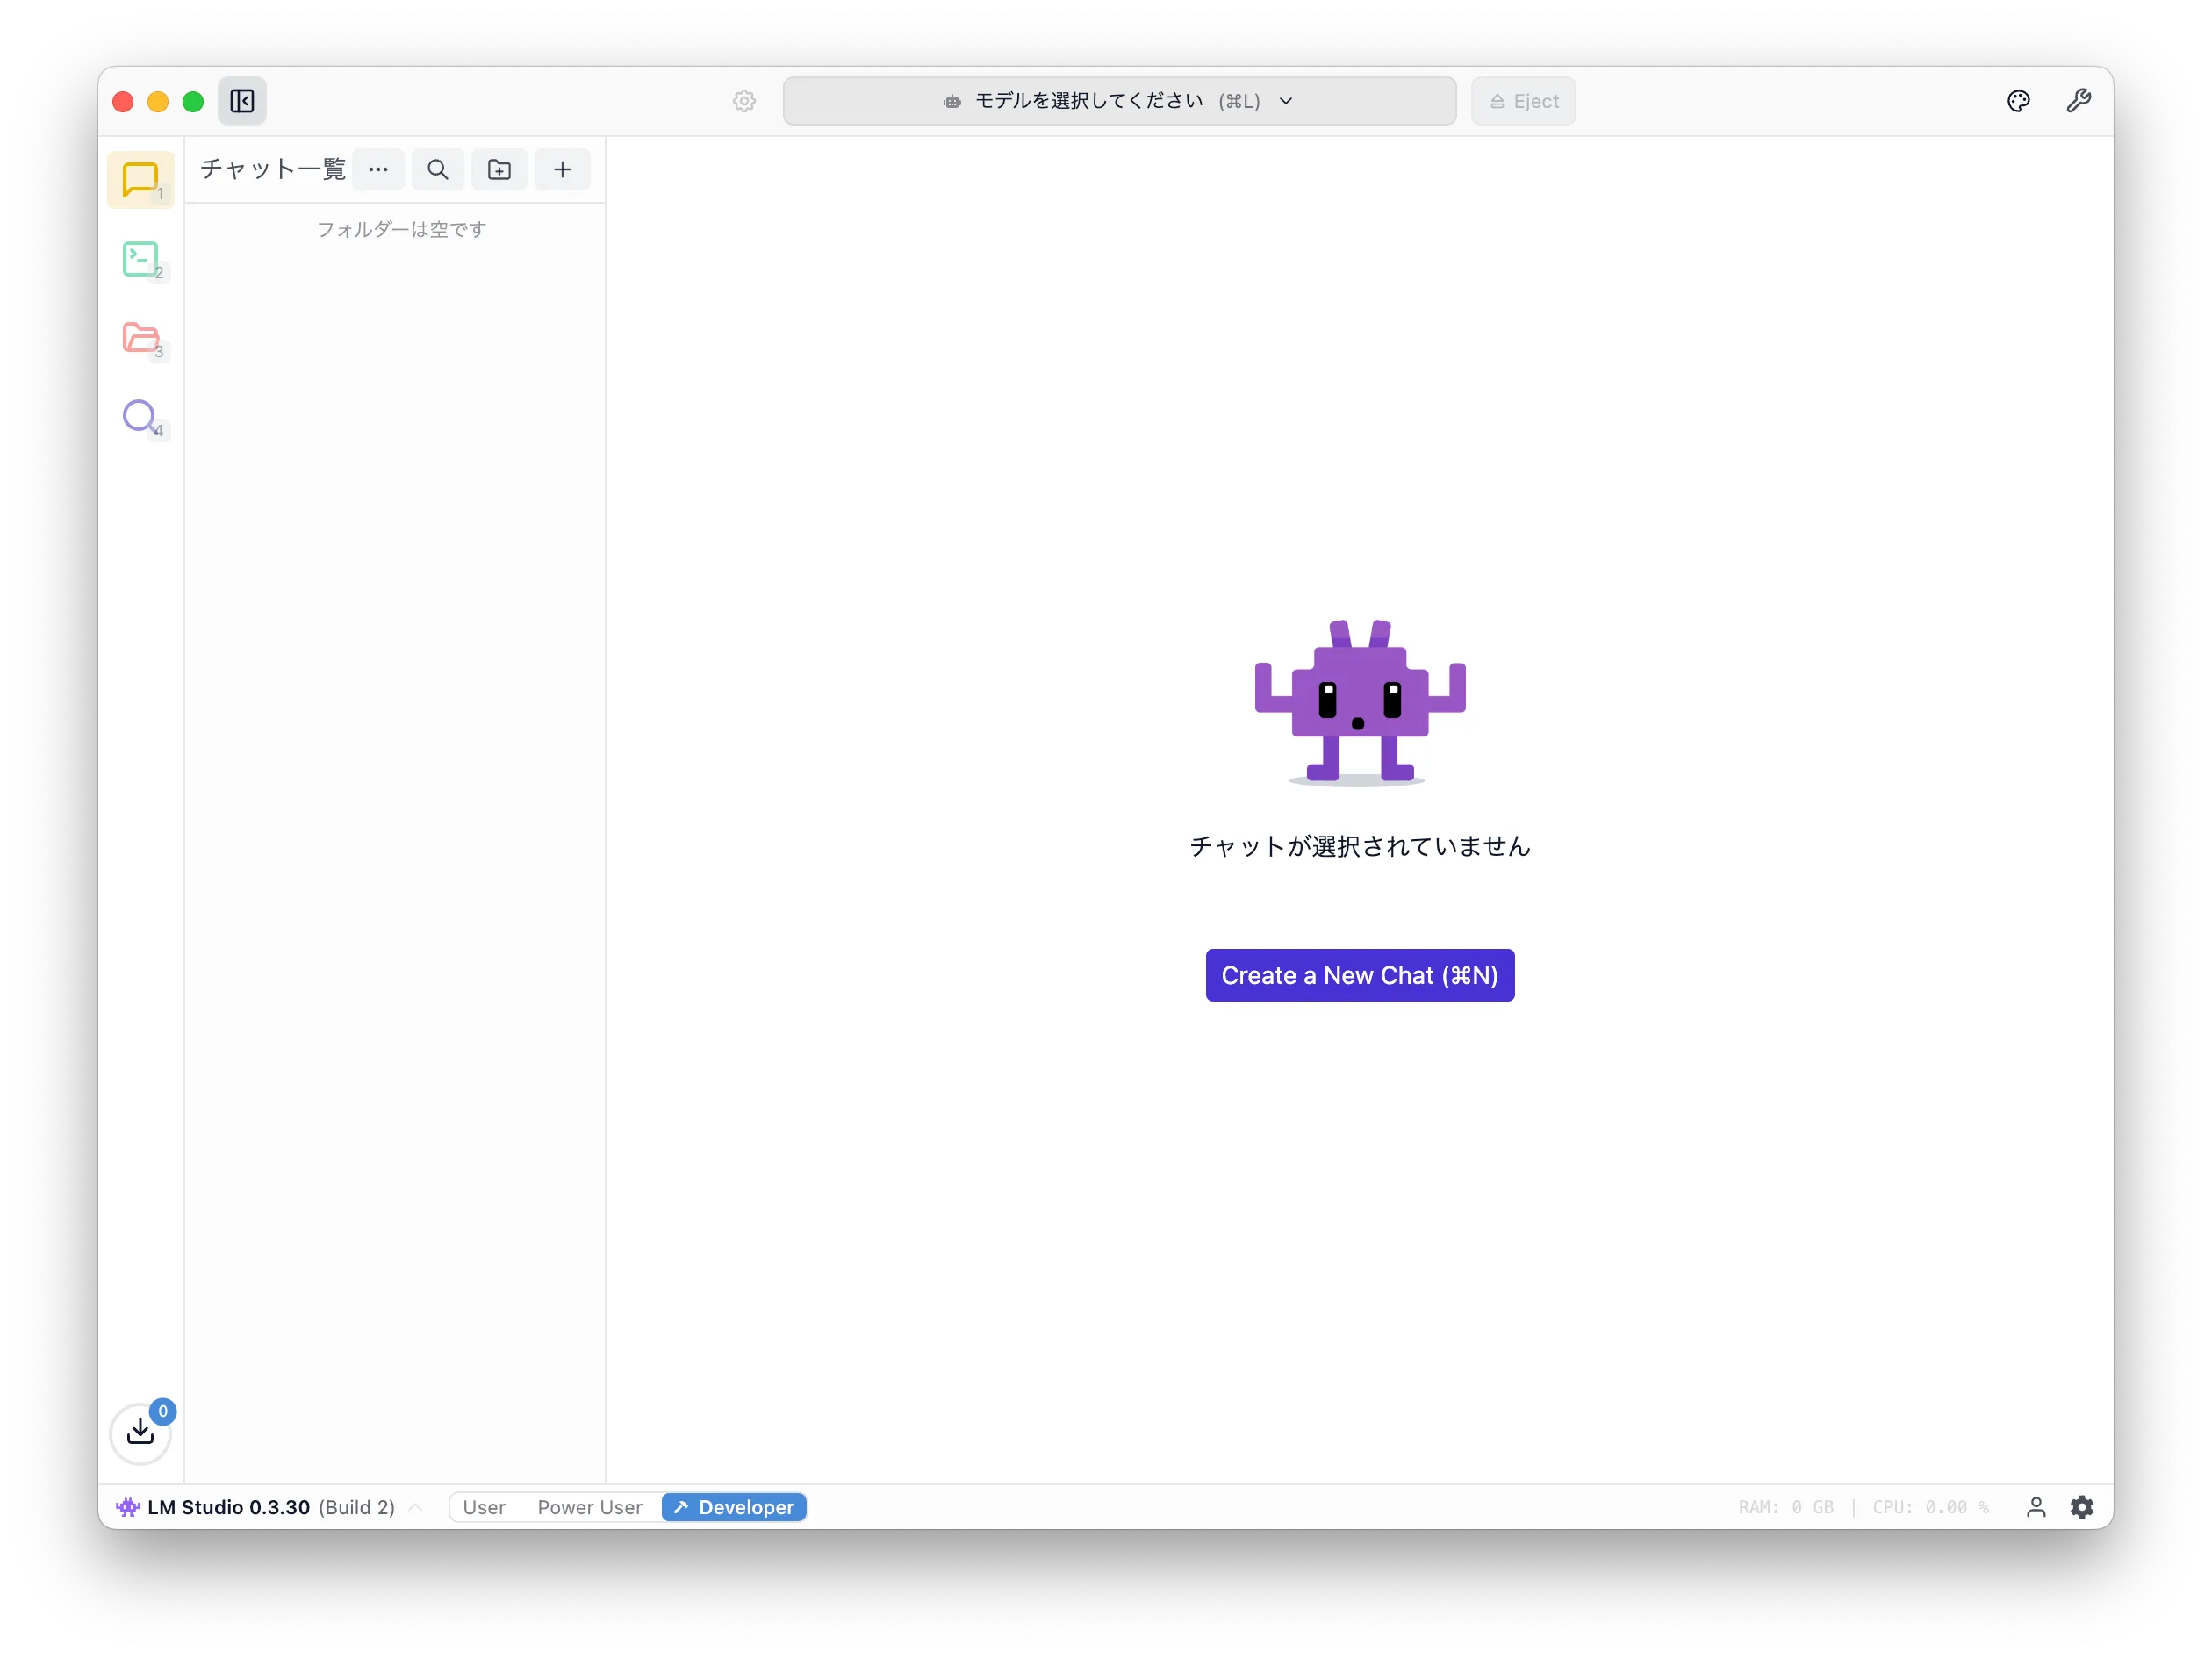
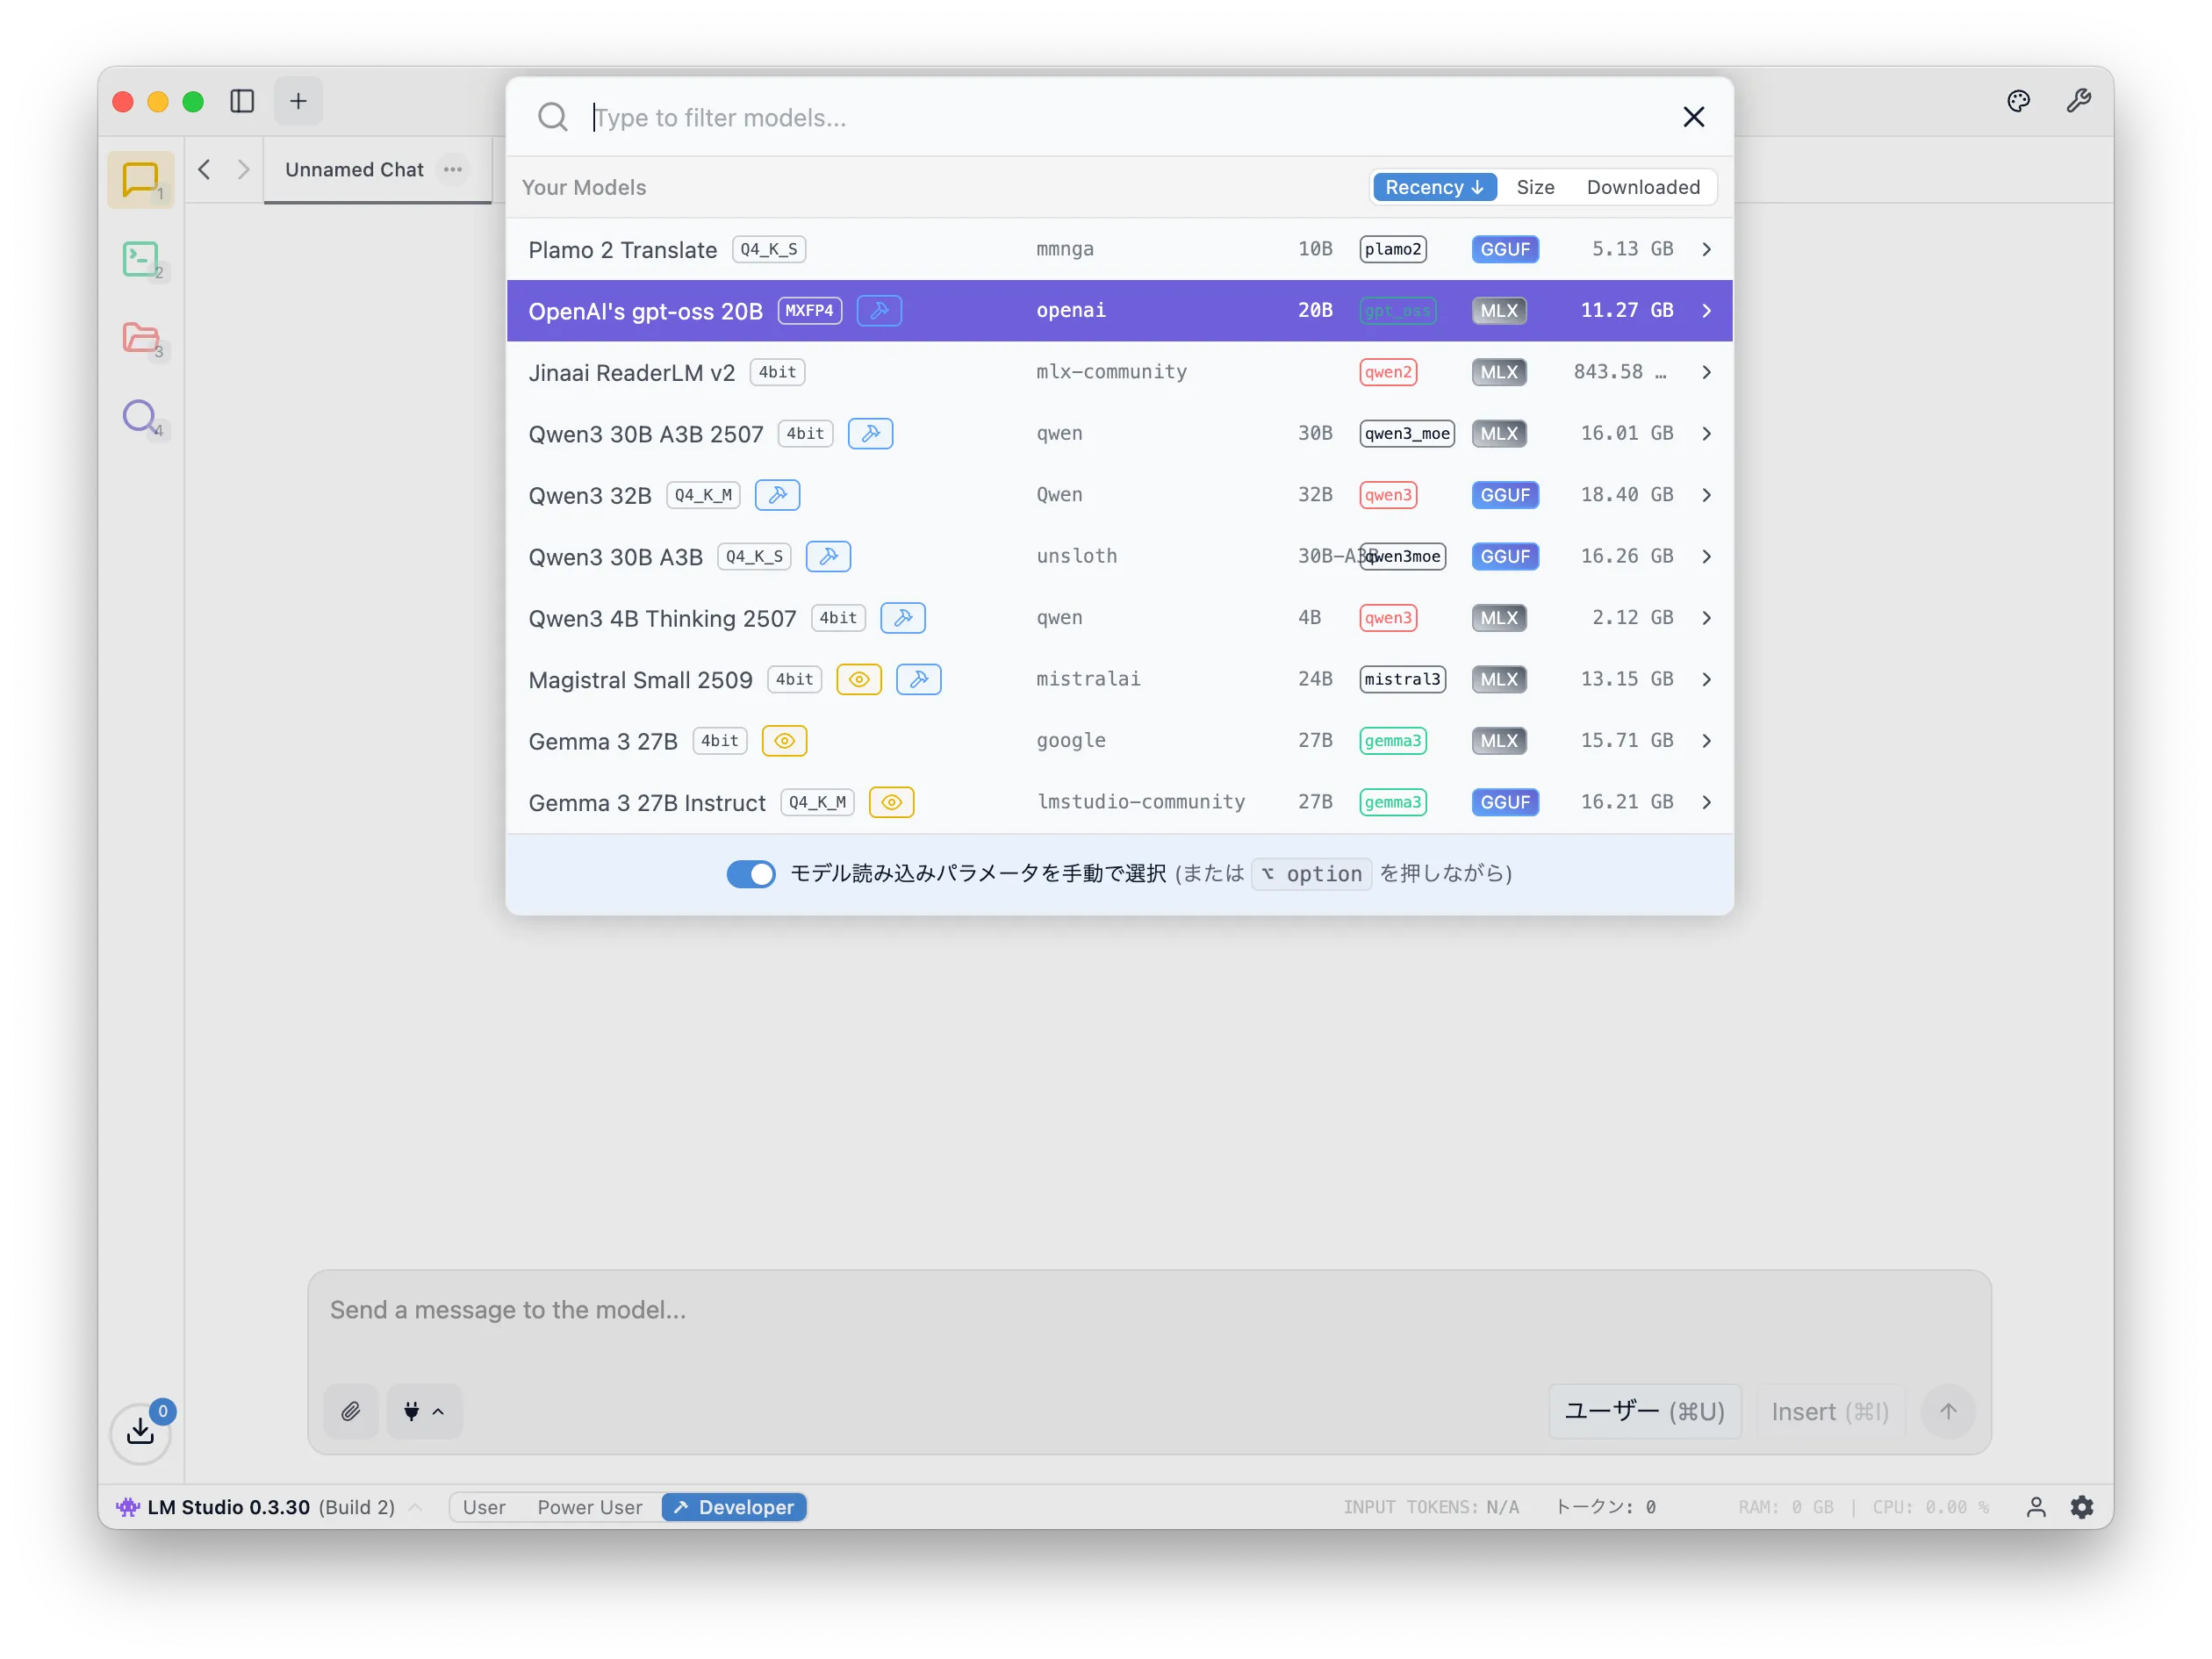
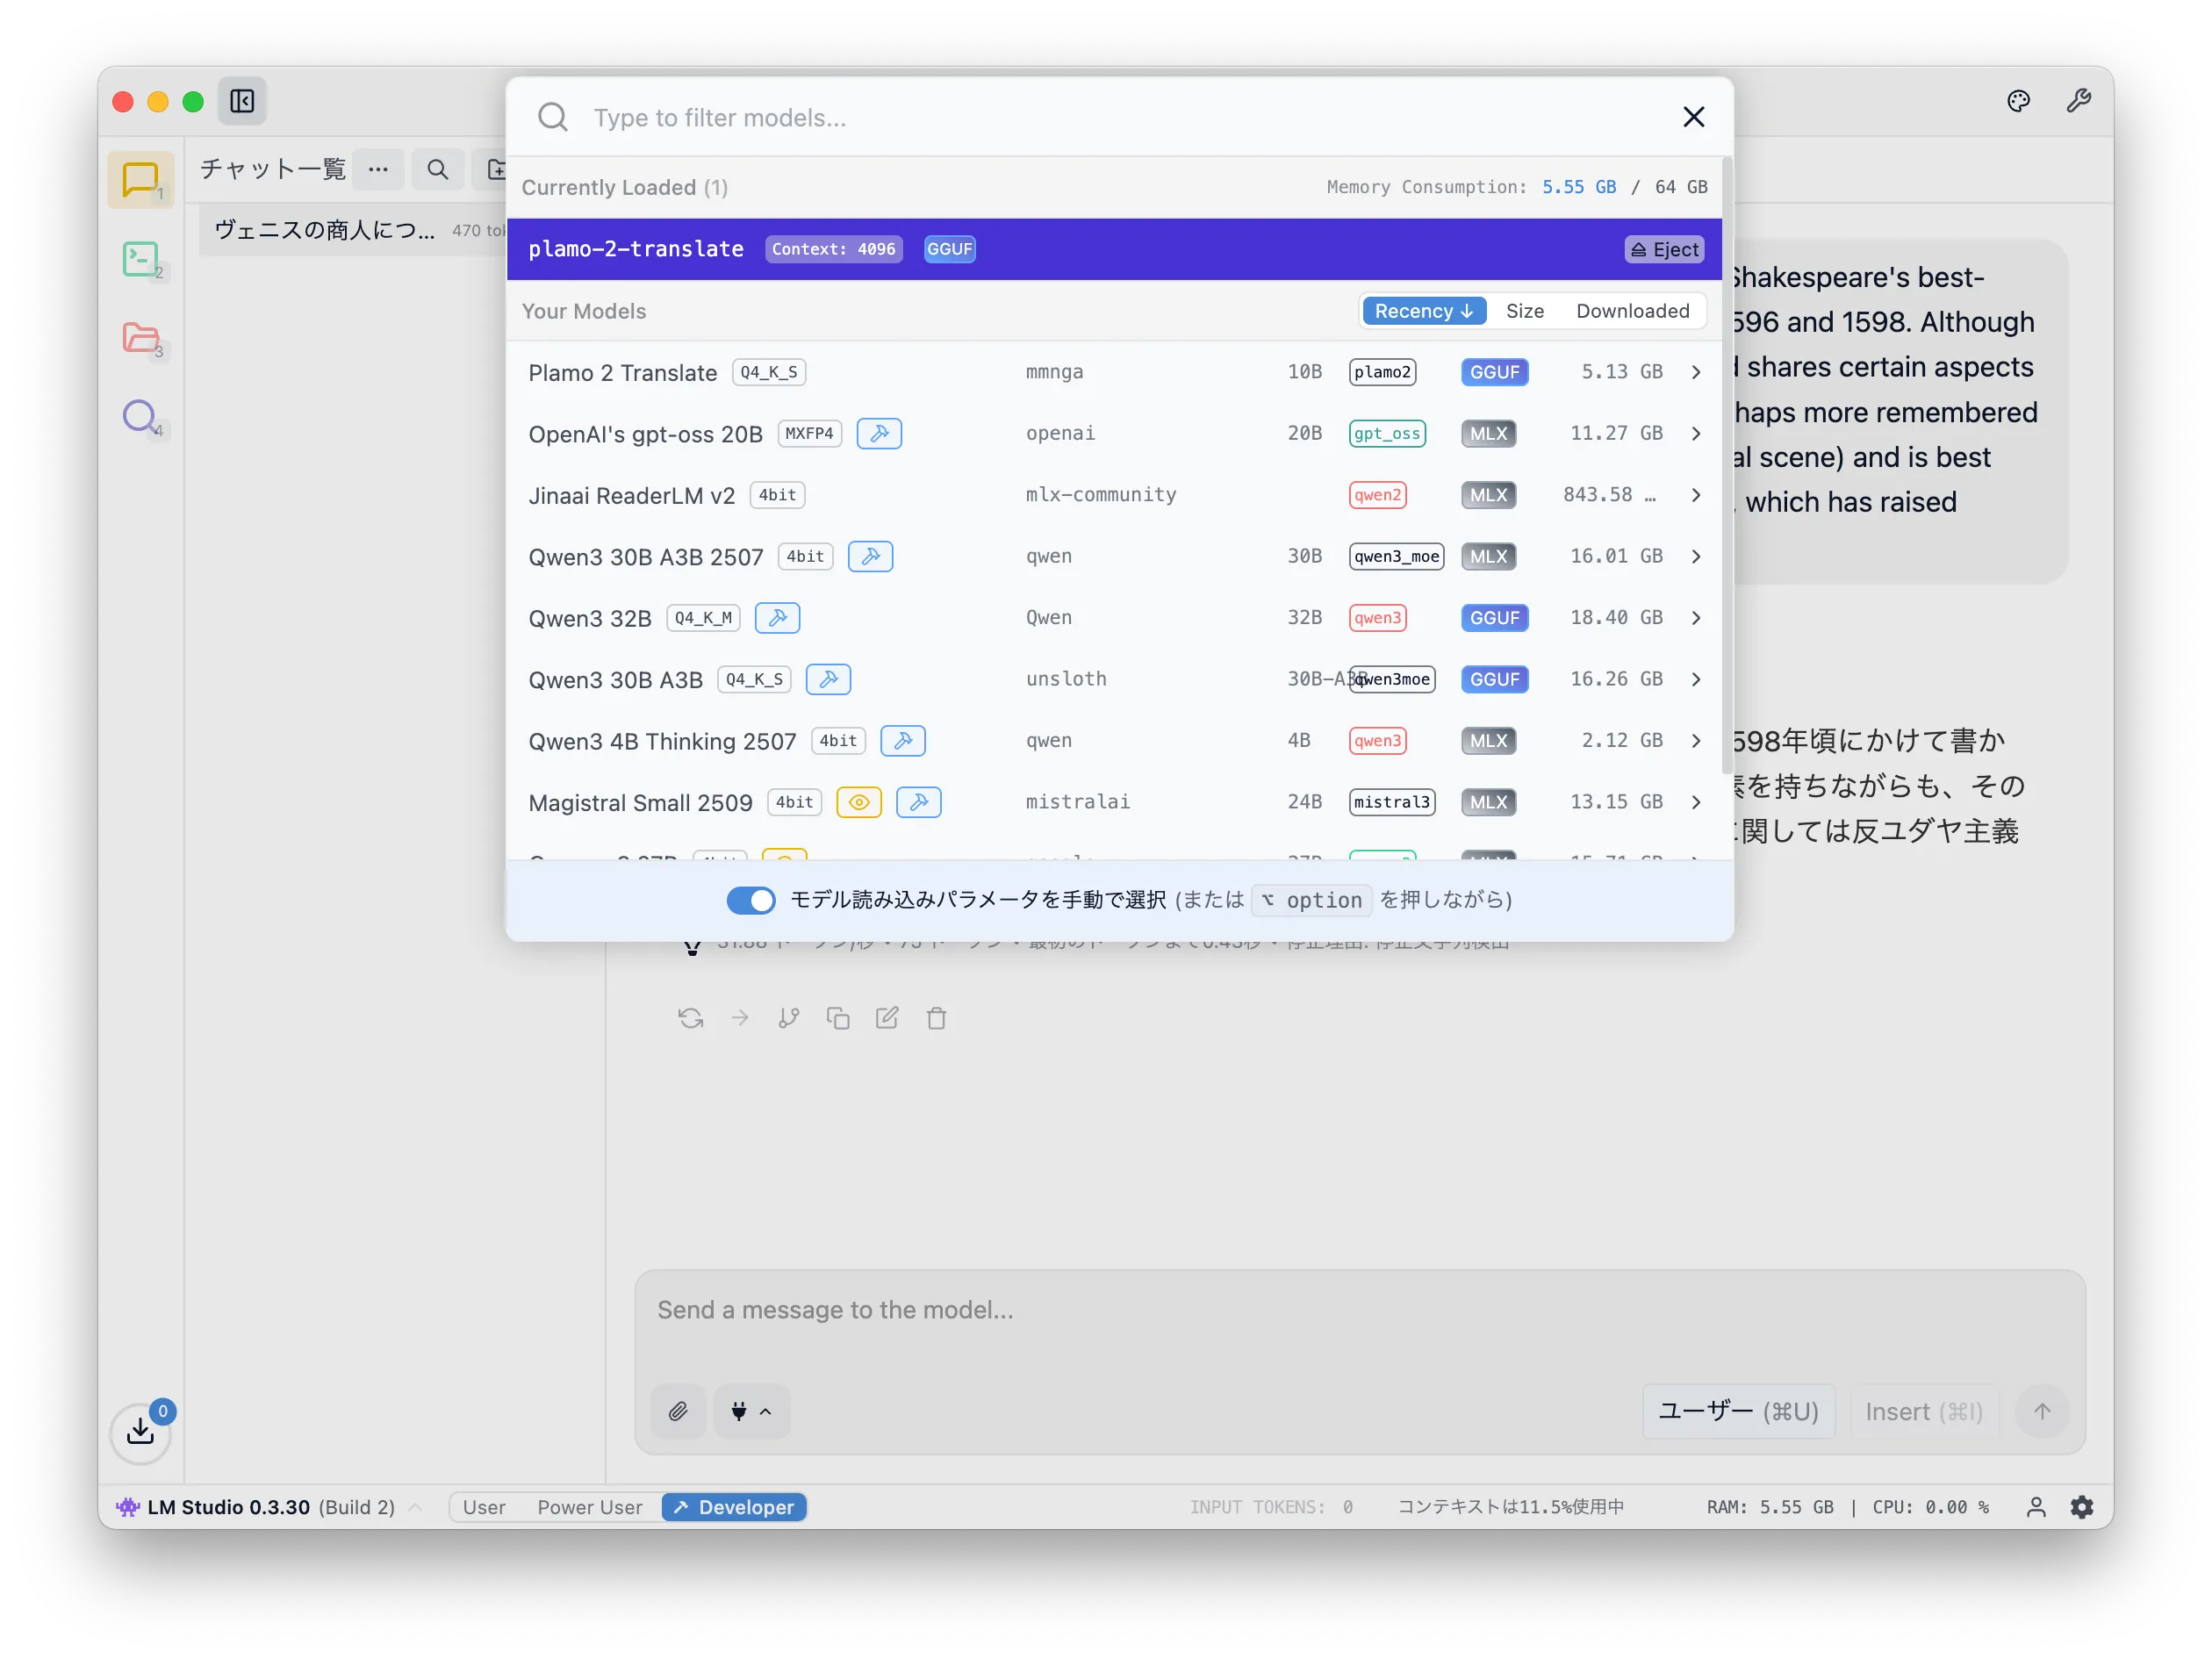
Click "Select a model" at the top and choose "Plamo 2 Translate" from the downloaded list.
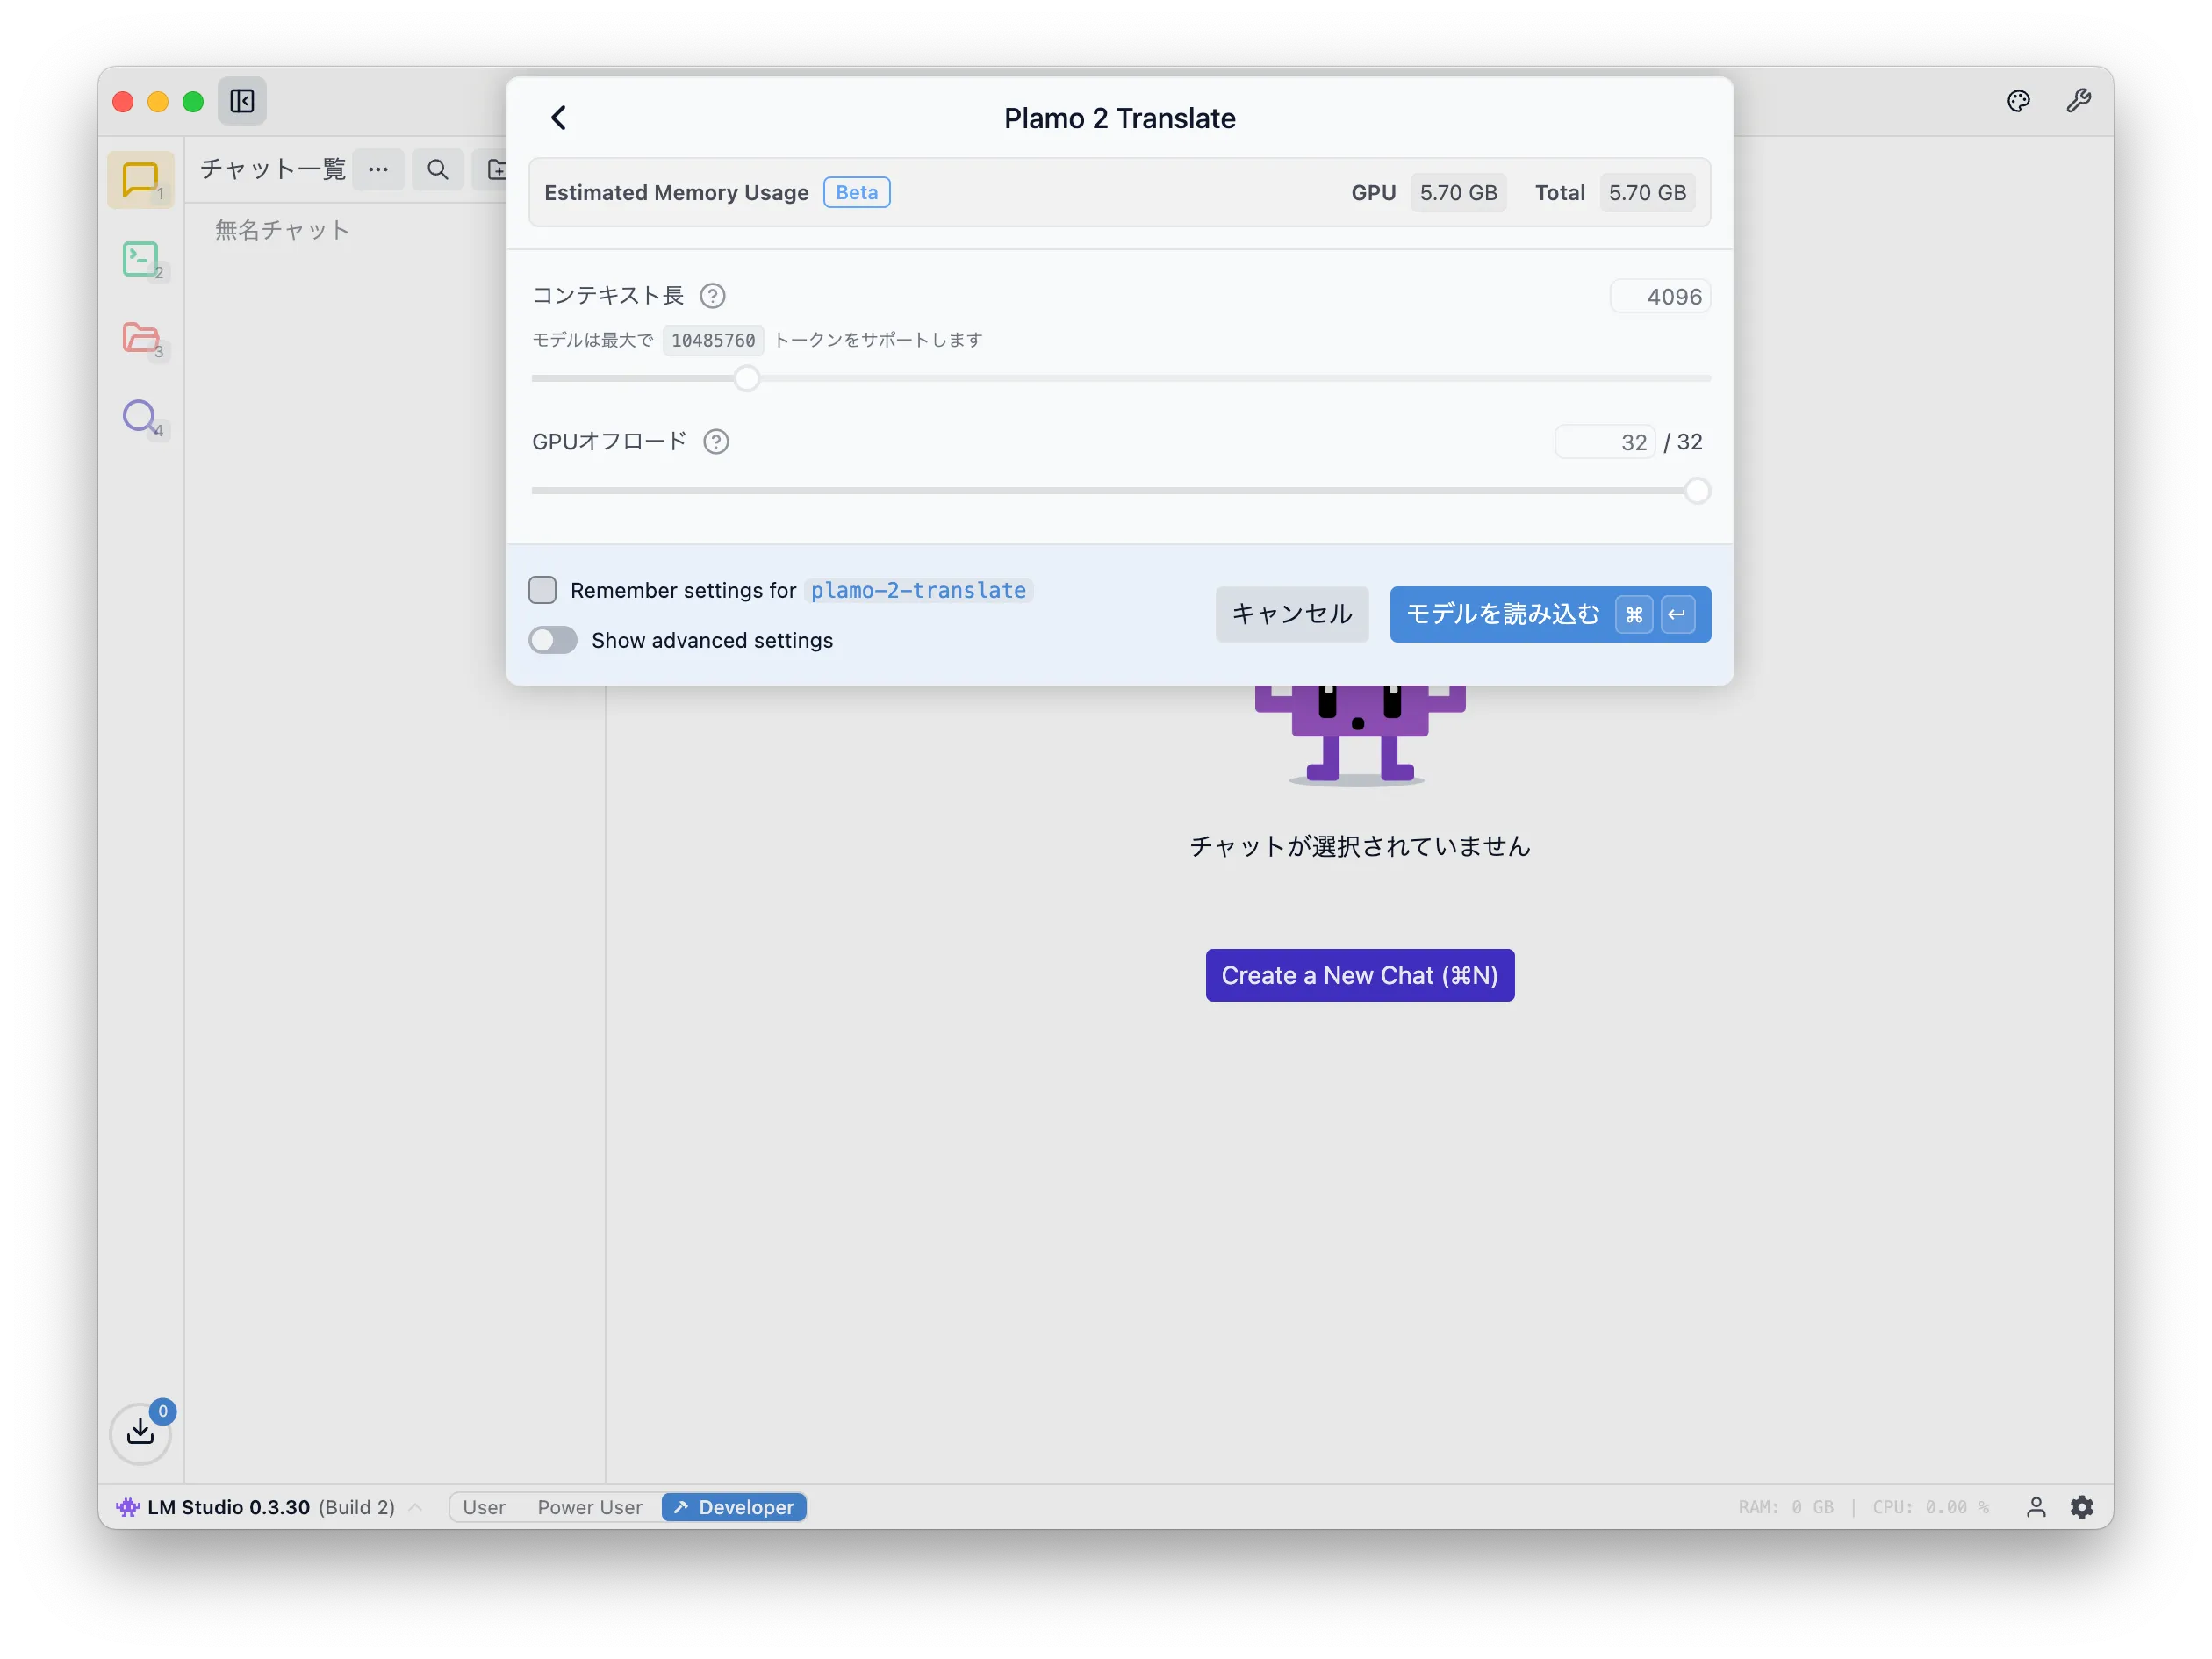
You will be prompted with some settings; leave them as default and click "Load Model".
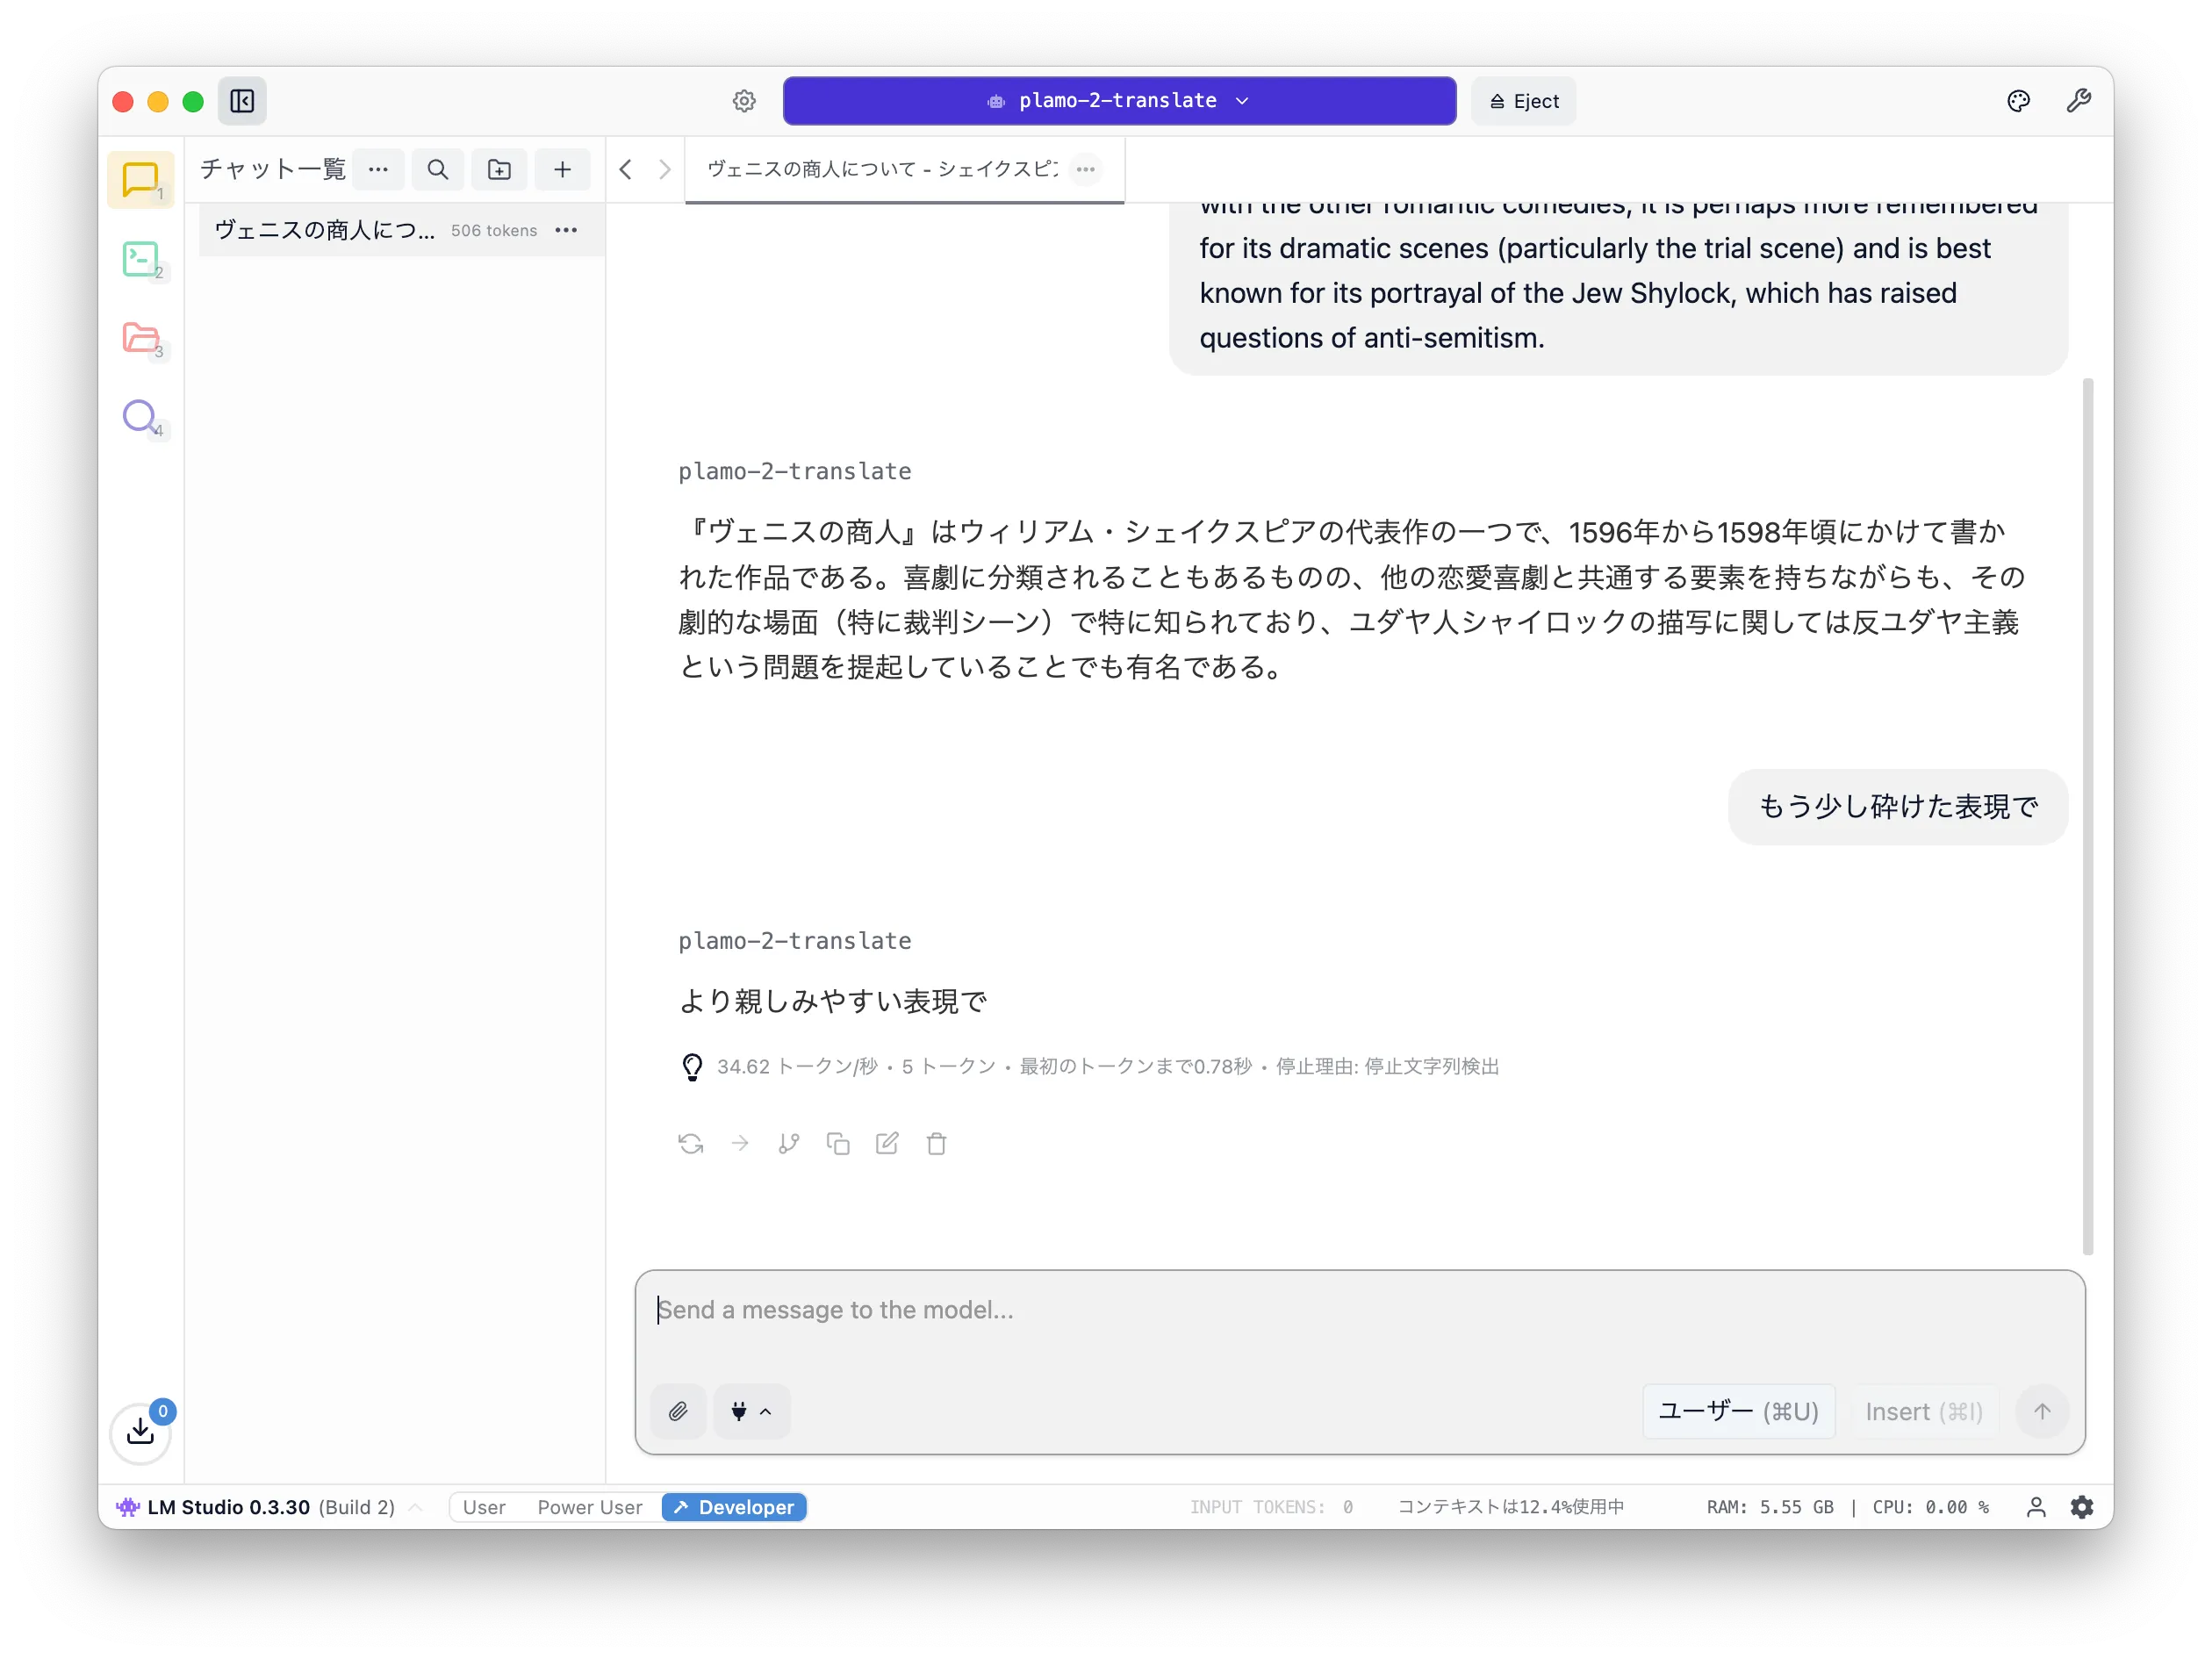
You will see a familiar ChatGPT-like UI. Enter English and press Enter. PLaMo Translation returns the Japanese translation. In the screenshots, I used a description of Shakespeare's The Merchant of Venice.
Compared to Google Translate, it seems more paraphrased, but the context is preserved, so it may be useful when you want to quickly translate large amounts of collected English information. I plan to try it for machine translation of this blog and adopt it if the quality is good enough.
Notes
Since the model is not trained for conversational use, giving translation instructions does not help.
You can configure the translation direction (English -> Japanese or Japanese -> English), but it only works correctly when the input language matches that configuration.
Eject
Finally, either fully stop LM Studio or eject the model so memory is not allocated when unused.
English translation by PLaMo up to here
I fed the sections above into PLaMo Translation and tried English output as a reference.
It seems it cannot read Markdown as-is (maybe Frontmatter or the <|plamo:op|> in the text?),
so for practical use you may need to parse and pass only Japanese parts,
or convert to plain text to preserve context.
If <|plamo:op|> is the cause, then it won't be a problem except for articles about PLaMo, but you would still need to escape it.
1## PLaMo Translation23On May 27th of this year, Preferred Networks Inc. (PFN) [released PLaMo Translation](https://tech.preferred.jp/ja/blog/plamo-translate/).4For a detailed introduction to PLaMo Translation, please refer to the official blog, but to briefly summarize, this model is a translation system based on large-scale language models (LLMs), much like the well-known ChatGPT.56The PLaMo Translation model is available on [HuggingFace](https://huggingface.co/pfnet/plamo-2-translate) and comes with a [demo page](https://translate.preferredai.jp/).7Since the model is publicly available on HuggingFace, it means we can run it on our local PC as well.8PFN has also announced a [PLaMo Translation CLI tool](https://tech.preferred.jp/ja/blog/plamo-translate-cli/) for command-line use.910While there are multiple methods to run the model, here we'll demonstrate how to execute it using LM Studio.1112## LM Studio1314[LM Studio](https://lmstudio.ai/) is a graphical user interface (GUI) application that allows you to easily run LLM models in your local environment.15To install it, simply download the installer from the [downloads page](https://lmstudio.ai/download),16and execute it to complete the installation process.1718### Downloading the Model1920After launching LM Studio, proceed to download the model.21You can access the download screen by clicking on the magnifying glass icon on the left side of the window that appears after launch.2223<Img src="./images/lm-studio_launch.png" />2425To download the PLaMo Translation model, enter a search term like "plamo translate" in the search field. This will display several matching models; select the one published by the user mmnga and click the "Download" button. In the screenshot above, the text "Use in New Chat" indicates that you have already downloaded this model.2627<Img src="./images/lm-studio_donwload-model.png" />2829### Model Configuration3031After completing the model download, click the folder icon on the left side of the window to open the screen displaying your downloaded models.32You should find a model with the name `plamo-2-translate` in the list of available models; then click on the gear icon in the "Action" column of that row.3334<Img src="./images/lm-studio_model-list.png" />3536This will display configuration settings for editing the default parameters of the model.37To use PLaMo Translation with LM Studio, you need to modify the settings under both the **Prompt** tab's "**Promp Template**" and "**Stop String**" options.38While writing this article, I noticed that changing the "**Additional Stop String**" instead of "**Stop String**" might also work well.3940<Img src="./images/lm-studio_model-template.png" />4142#### Prompt Template4344Delete all the default template text ("Template (Jinia)"), and replace it with the following template:4546```txt47<|plamo:op|>dataset48translation49{% for message in messages %}50<|plamo:op|>input lang=English51{{ message['content'] }}52<|plamo:op|>output lang=Japanese53{% endfor %}54```5556The current configuration is set up for "English to Japanese translation."57For "Japanese to English translation," you should configure it as follows:5859```txt60<|plamo:op|>dataset61translation62{% for message in messages %}63<|plamo:op|>input lang=Japanese64{{ message['content'] }}65<|plamo:op|>output lang=English66{% endfor %}67```6869#### Stop String7071Next, configure the "Stop String" as follows:7273```txt74<|plamo:op|>75```7677<Img src="./images/lm-studio_termination.png" />7879After entering the text in the textarea and pressing Enter, you'll see tag indicators displayed on the screen as shown below.8081### Let's Try It Out8283After completing the settings, click the speech bubble icon on the left side of the window to display the chat UI interface for using LLM models.8485<Img src="./images/lm-studio_chat.png" />8687Next, to load your model, click on "Select a Model" at the top of the window.88This will display the list of downloaded models; select "Plamo 2 Translate."8990<Img src="./images/lm-studio_load-model.png" />9192You'll then be prompted with some settings, but here we'll leave everything as default and click "Load Model."9394<Img src="./images/lm-studio_model-configuration.png" />9596This will display the familiar UI similar to ChatGPT, so simply enter some English text and press Enter.97PLaMo Translation will then provide you with the Japanese translation.98In these screenshots, I have provided a [description](https://etc.usf.edu/lit2go/41/the-merchant-of-venice/) of Shakespeare's "The Merchant of Venice."99100<Img src="./images/lm-studio_translate.png" />101102<Img src="./images/google-translate.png" />103104Compared to Google Translate, I feel there are many parts that have been paraphrased rather than directly translated,105but the translation doesn't lose the original context, so it may prove useful when you need to quickly compile and translate large amounts of English information.106I'll try using it for machine translation of this blog, and if the results are satisfactory, I think I'll adopt it.107108### Important Note109110As a note, since the model hasn't been trained for conversational usage, providing translation instructions won't be effective.111112<Img src="./images/lm-studio_plamo_response.png" />113114While the settings allow you to choose whether to translate from English → Japanese or Japanese → English,115the system will only function correctly when provided with language combinations matching those specific settings.116117### Eject118119Finally, be sure to either fully stop LM Studio or eject the model to prevent memory allocation when the model is unused.120121<Img src="./images/lm-studio_eject.png" />
This should be sufficient for publishing the blog for an English-speaking audience. As shown in LM Studio, my environment gets 30–40 token/s, so it doesn't feel slow.
Conclusion
I introduced how to use PLaMo Translation with LM Studio. It's fast enough that using it locally to grasp the gist of English text feels useful. API translation services cost money, so being able to do English<->Japanese translation at this quality without extra cost is nice.
I also saw a Zenn article that published a tool to translate Markdown/epub using PLaMo Translation, so I want to build something similar.
